


ACCESS CONTROL DEVICES - CAME ZA5


Description of control board
The ZA5 control board is suitable for controlling one automation of ATI, FERNI and FROG series 230V swing gates with up to 600W power and 50- 60Hz frequency.
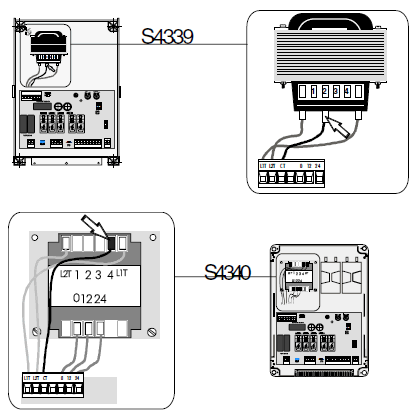
Wholly designed and built by CAME S.p.A., it meets UNI 8612 regulations in force. The board is inserted and fixed to the ABS case (S4339 o S4340), which has an IP54 protection level, with air recycling inlet and transformer.
The board requires 230V (a.c.) at terminal blocks L1-L2 and the inlet is protected with two 5A fuses. A 3.15A fuse protects the low voltage command devices.
The accessories’ total wattage (24V) must not exceed 20W.
Safety
Photocells can be connected to obtain: - Re-opening during closure (2-C1), if the photocells identify an obstacle while the gate is closing, they will reverse the direction of movement until the gate is completely open; - Total stop (1-2), shutdown of gate movement without automatic closing; a pushbutton or radio remote control must be actuated to resume movement).
Accessories which can be connected to this unit:
-
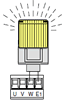
Flashing signal light when gate is in motion 25W max. (E1-W)
-
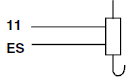
Electric lock (11-ES);
-
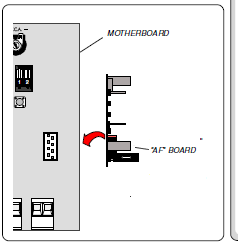
Radiofrequency «AF» board
Other functions available
-
Automatic closing. The automatic closing timer is automatically activated at the end of the opening cycle. The preset, adjustable automatic closing time is automatically interrupted by the activation of any safety system, and is deactivated after a STOP command or in case of power failure;
-
"Operator present" function: Gate operates only when the pushbutton is held down (the radio remote control system is deactivated);
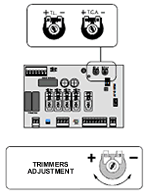
Adjustments - Trimmer TL = Adjustment of operating time; - Trimmer TCA = Adjustment of automatic closing.
![]() Caution! Disconnect the unit from the main power lines before carrying out any operation inside the unit.
Caution! Disconnect the unit from the main power lines before carrying out any operation inside the unit.
MOTHERBOARD
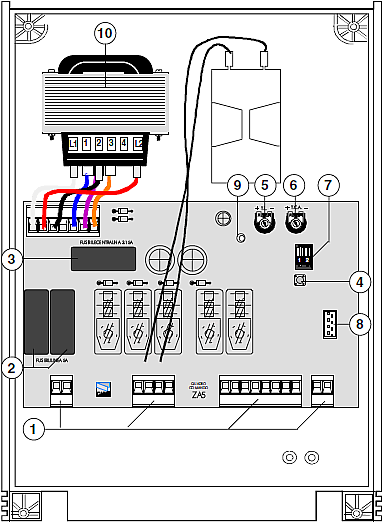
NB: series FROG, connect the black wires coming out of the board to the condenser’s connectors.
COMPONENTS
-
Terminal blocks for connection
-
5A line fuse
-
15A central control unit fuse
-
Radio-code save buttons
-
Trimmer TL: Operating time adjustment
-
Trimmer TCA: Automatic closing time adjustment
-
2-dip function switch (see below)
-
Socket AF radiofrequency board
-
Signal LED
-
Motor torque regulator (see below)
ELECTRICAL CONNECTIONS

| 230V (a.c.) power input | |
| 230V (a.c.) single-phase motor max. 600W | |
230V (a.c.) output in motion |
|
 |
(12V - 15W max.) connection for electrically-actuated lock |
| 24V (a.c.)Powering accessories (max 20W | |
| (24V-3W max.) "gate-opened" signal lamp | |
| Pushbutton stop (N.C.) | |
| Open button (N.O.) | |
| Contact radio and/or button for control | |
| Contact (N.C.) for «re-opening during the closing» | |
| Antenna connection |
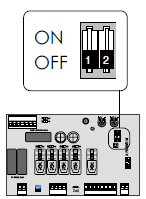
«1 OFF» “Operator present”, gate operates only when the pushbutton is held down (the radio remote control system is deactivated) disabled; (1 ON - enabled)
«2 ON» “Automatic closing” enabled; (2 OFF - disabled)
ADJUSTMENTS
Trimmer T.L. = Adjusts operating time from a minimum of 5 seconds to a maximum of 50 seconds.
Trimmer T.C.A. = Adjusts automatic closing time from a minimum of 3 seconds to a maximum of 130 seconds.
To vary the motor torque, move the indicated faston to one of the four positions: 1=min, 4=max
ZA5
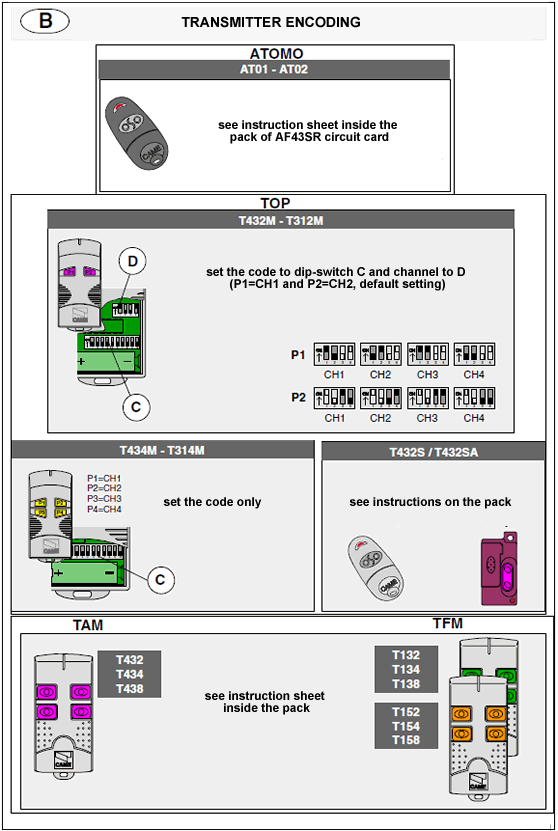
RADIO CONTROL INSTALLATION
| PROCEDURE |
| A. insert an AF card ** |
| B. encode transmitter/s |
| C. store code in the motherboard. |
 |
|||||||||||||||||||
|
 |
||||||||||||||||||
 |
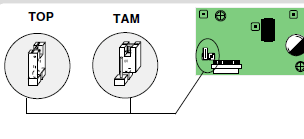
(**) On AM transmitters operating at 433.92 MHz (TOP and TAM series), position the jumper connection on circuit card AF43S as shown on the sheet. | ||||||||||||||||||
 |
|||||||||||||||||||
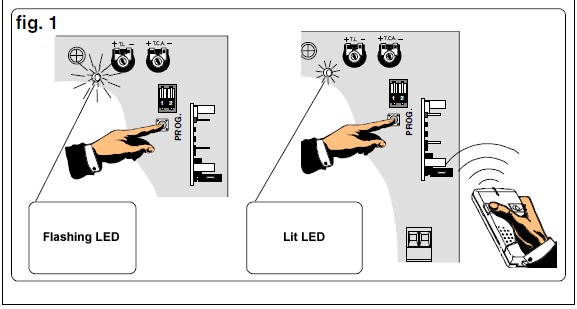
![]() AF board should ALWAYS be inserted when the power is off as motherboard only recognises it when it is powered
AF board should ALWAYS be inserted when the power is off as motherboard only recognises it when it is powered
|
|
 |